

Catetory
2026 New LED Screen Price for You
Fill in the information and get your LED screen budget immediately!
Featured Articles
Shortlist a Chinese supplier of 500×500 mm rental LED cabinets for a curved trade-show booth only after it demonstrates the proposed curve inside your usable booth footprint. The deciding evidence is a dimensioned layout, the exact curve-lock configuration, a representative assembly test and a documented service route. A photograph of a curved stage does not establish that the same cabinets will fit an exhibition stand.
- Define whether the visible face curves inward or outward and where visitors stand.
- Obtain a plan showing the entire support system, not just the display surface.
- Demonstrate the quoted cabinets and locks at the intended settings.
- Agree the content map, service access and acceptance evidence before shipment.
Contents — curved booth buying checks
1. Start with the booth footprint
Send the supplier the organiser’s usable stand dimensions and a top-view drawing. Mark open aisles, neighbouring stands, doors, furniture, demonstration areas and the position of the LED wall. Specify whether dimensions describe the visible display, its overall assembly or the rented floor area; these are different boundaries.
Ask for the finished curve’s end-to-end span and depth, together with the support base, bracing, cabling and working space. A screen can remain inside the stand line while its base projects into an aisle. Have the stand contractor and venue review the full layout before approving equipment.
Cabinet-count example: twelve 0.5 m-wide cabinets in one row provide 6 m of combined cabinet-face width. Six rows give a 3 m-high assembly and 72 cabinets, covering 18 m² of display surface. Once the row bends, 6 m is not its straight end-to-end span. The supplier must calculate that footprint from the actual cabinet geometry and joint angles. This example counts modules; it does not approve a curve radius, support arrangement or structural load.
2. Verify the actual curve hardware
A rigid rental cabinet typically creates a faceted curve through the angle between neighbouring cabinets. Distinguish this from a flexible display whose modules bend. Ask the supplier which mechanism it is quoting, which locks are included and which concave and convex arrangements are supported by that exact revision.
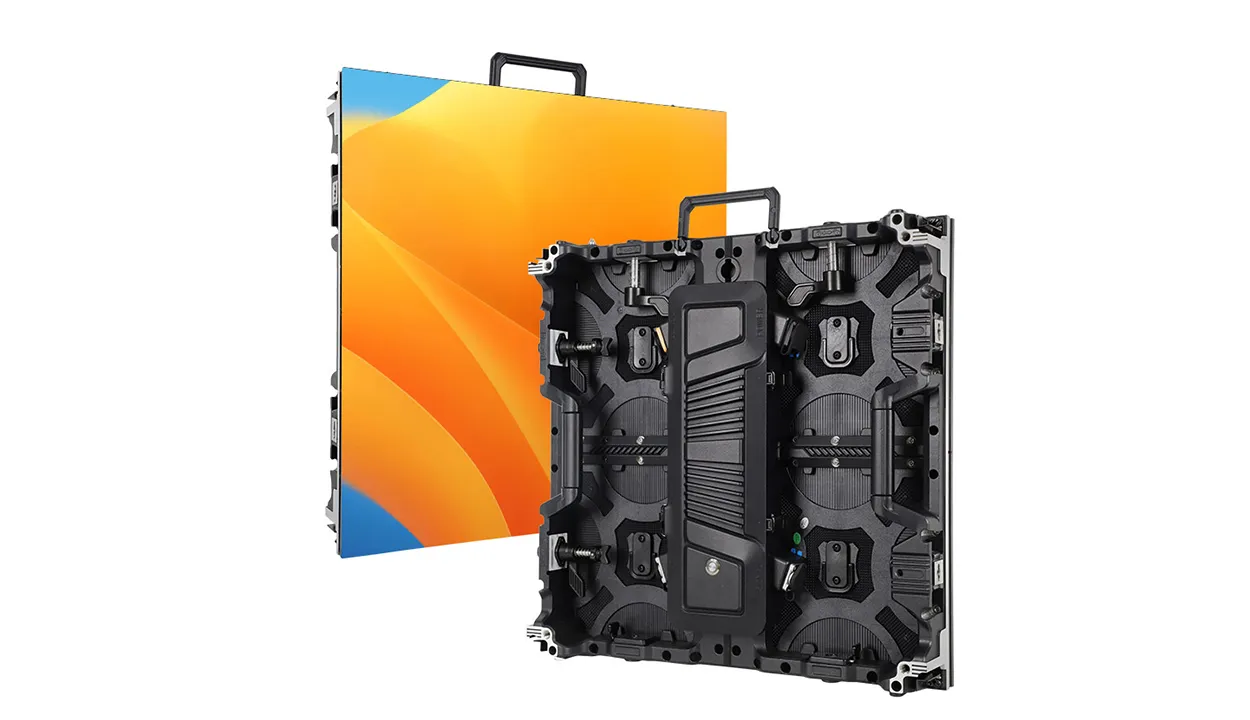
The EA500C6 product page describes a 500×500 mm cabinet with optional curve locks. The word optional matters: request an itemised quotation and photographs of the supplied lock assembly. Do not infer a model’s allowed adjustment range from scale markings in a promotional image.
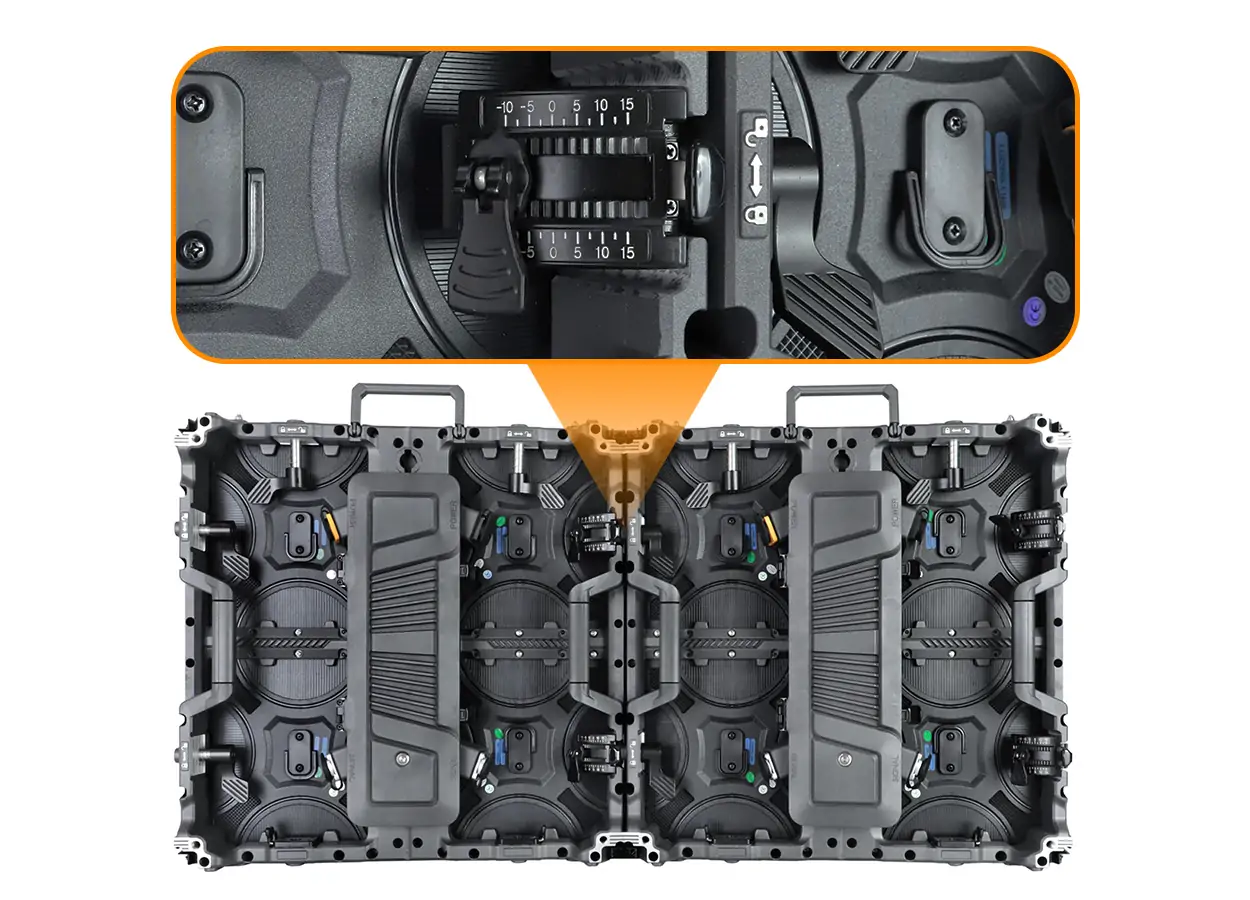
Arrange a live demonstration of several adjoining cabinets with the intended lock settings. View both faces of the assembly, the joints and the rear service route. Request a close view of alignment and module edges, then have the demonstrator separate and rebuild one joint. Retain the demonstration reference with the quotation.
The existing EA500C6 arc-splicing tutorial explains a model-specific operation. Use the current manufacturer instructions for your purchased revision; a tutorial is not a structural design for the finished booth.
3. Send suppliers the same evidence request
Use this comparison sheet before a deposit. Mark each response as complete, clarify or missing, and name the document or demonstration that supports it. A supplier that identifies an unresolved limitation gives you more useful information than one that accepts every drawing without review.
| Decision | Evidence to request | Question to close |
|---|---|---|
| Geometry | Dimensioned top view and cabinet/joint schedule | Does the complete assembly fit the stand boundary? |
| Hardware | Exact cabinet revision, lock list and permitted settings | Are the quoted curve parts included? |
| Structure | Support drawings and installation responsibilities | Who approves loads and the venue submission? |
| Visual result | Representative curved sample with your content | Are seams and text acceptable from visitor positions? |
| Maintenance | Demonstrated module and electronics replacement route | Can a fault be repaired within the actual booth space? |
| Delivery | Labelled packing list, configuration backup and acceptance plan | Can the local crew reproduce the approved assembly? |
Also verify the factory and contracting company, the entity responsible for support, and the scope of any documents supplied for the destination. For European projects, ask the importing party to check the documentation for the exact configuration and applicable market requirements. A logo on a brochure does not settle that review.
4. Test the visitor view and content map
Stand where visitors enter, stop and walk past the booth. Evaluate small text, logos and the transition around the curve using representative content. A visual designed for a flat screen may look distorted from an oblique aisle view. Agree whether the creative team will adapt the artwork or the processor will map it; neither should remain an assumption.
Request the native pixel canvas, cabinet orientation, signal routing and the processor configuration. Confirm pixel pitch against the closest intended viewing position using a sample, rather than choosing solely from cabinet size. If staff will film demonstrations or livestream from the booth, test the actual camera settings with the proposed brightness and content.
Check service access in the same demonstration. A cabinet described as maintainable from one side still needs a practical route for removing its components, handling tools and reconnecting cables. Resolve conflicts with shelving, back walls and stored equipment before the stand is built.
5. Approve a build and handover package
Choose a supplier that can identify which production cabinets, locks, accessories and electronic configuration correspond to the approved sample. Put substitution approval in writing. At inspection, compare the packed items with the cabinet map and confirm that spare parts match the supplied revisions.
Ask for labelled cases, a packing sequence, configuration files, assembly documentation and a support contact available during your exhibition build hours. Establish who trains the local crew and who handles a missing or damaged part. Confirm repair freight, exclusions and spare availability in the written commercial terms.
Finally, agree what demonstrates acceptance: the intended curve, visible joint quality, the approved content test and successful servicing of a representative component. Record observations against the specification. Avoid accepting an unrelated flat-wall video as evidence that your curved booth assembly passed.
6. Questions integrators should resolve
Does 500×500 mm specify the minimum curve radius?
No. It specifies the cabinet’s nominal face dimensions. The permitted joint angles, cabinet construction and support arrangement determine feasible layouts. Obtain a dimensioned proposal for the exact hardware.
Can an outdoor cabinet be used in an indoor exhibition booth?
Ask the supplier to confirm the proposed indoor operating configuration, usable brightness range, service access and suitability for the venue. An outdoor protection claim alone does not answer those questions.
Is a full-size booth sample always necessary?
A representative multi-cabinet demonstration can answer many hardware and visual questions, but it must cover the critical joints and viewing positions. Have the responsible project team decide whether the remaining geometry or installation risks require a larger trial assembly.
7. Prepare a project enquiry
Include: exhibition country and venue; build and show dates; usable stand plan; desired screen height, span and curve direction; visitor positions; content examples; camera use; support method; service space; existing fleet details; and delivery destination.
Ask EagerLED for the proposed 500×500 cabinet configuration, included curve hardware, a footprint drawing and a witnessed sample test.
EA500C6 images are product references, not photographs of a completed customer booth. Confirm all dimensions, hardware limits and commercial terms for the final order.
Related articles
Eager LED Screens for Indoor and Outdoor Advertising
Eager LED screens offer options for indoor presentations, outdoor signage and business advertising. Choosing the right display starts with your viewing distance, ambient light, content and installation space. This […]
NovaStar H2 vs H5 vs H9 vs H15: LED Controller Guide
Compare standard NovaStar H2, H5, H9 and H15 chassis by input and output card slots. Calculate the wall load, map the cabinet routes and confirm the required layouts before selecting a configuration.
Rental LED Video Wall: Latest Features, Prices, FAQs and More
Rental LED video wall prices are built from screen area, pixel pitch, cabinet type, rental duration and the services included in the package. Whether you are planning concerts, conferences, […]
GET A QUOTE
Consult us for LED display solutions