
Black spots on screen do not automatically mean a TV, monitor, laptop, or phone display is ruined. Some marks are only dirt or a connection problem, while others point to dead pixels, pressure damage, a failing backlight, or a damaged display panel. The key is to identify what kind of spot you are seeing before trying a repair.
This guide explains seven common causes, shows you how to perform a safe screen test, and helps you decide whether the correct fix is cleaning, reconnecting a cable, using a built-in diagnostic, replacing an LED module, or arranging professional service.
1. What Do Black Spots on Screen Mean?
Black spots on screen are areas that remain darker than the surrounding image. Their shape, size, and behavior provide useful clues.
A single sharp dot that stays black on every color is often a dead pixel. A soft gray cloud on a television may be caused by uneven backlighting or contamination inside the panel. An irregular ink-like blotch after a drop or impact usually indicates screen pressure damage. A rectangular black area that changes when you reconnect the cable may come from the video signal rather than the screen itself.
The device type matters too. A black spot on a TV screen may involve an LED backlight strip or diffuser. A black spot on a monitor may be a pixel defect, cable problem, or damaged LCD layer. Black spots on phone screens that grow over time commonly require urgent professional inspection because physical or liquid damage may be spreading through the panel.
How to Diagnose a Black Spot
Use this sequence to diagnose black spots on screen before attempting a fix:
- Turn the screen off. If the mark remains visible, inspect for dirt, residue, cracks, or damage to the outer surface.
- Display solid colors. Show white, black, red, green, and blue full-screen images. A black dot that stays in exactly the same location may be a dead pixel. A colored dot is more likely to be a stuck subpixel.
- Take a screenshot and view it on another device. If the spot appears in the screenshot, the problem may be software, content, or graphics related. If the screenshot looks clean elsewhere, the display hardware is the likely cause.
- Open the monitor’s built-in menu. If the black area also covers the monitor menu, the monitor hardware is involved. If the menu looks normal, test the source device and cable.
- Try another cable, port, or source. Connect a laptop to a different monitor or connect the monitor to another computer.
- Watch for change. Record whether the spot grows, flickers, changes with brightness, or reacts when the device warms up.
| What you see | Likely cause | First action |
|---|---|---|
| Smudge visible when powered off | Dirt or surface residue | Clean safely |
| One tiny, sharp black dot | Dead pixel | Run a dead pixel test and check warranty |
| Red, green, blue, or white dot | Stuck pixel | Run a pixel test or manufacturer diagnostic |
| Ink-like blotch or branching lines | Pressure or impact damage | Stop pressing the panel and arrange service |
| Soft dark cloud on bright scenes | Backlight or diffuser issue | Compare brightness levels and request inspection |
| Spot appears in a screenshot | Software, content, or graphics issue | Update or reinstall the graphics driver |
| One tile is dark on a modular LED wall | LED module, power, or signal fault | Swap-test the module and inspect connectors |
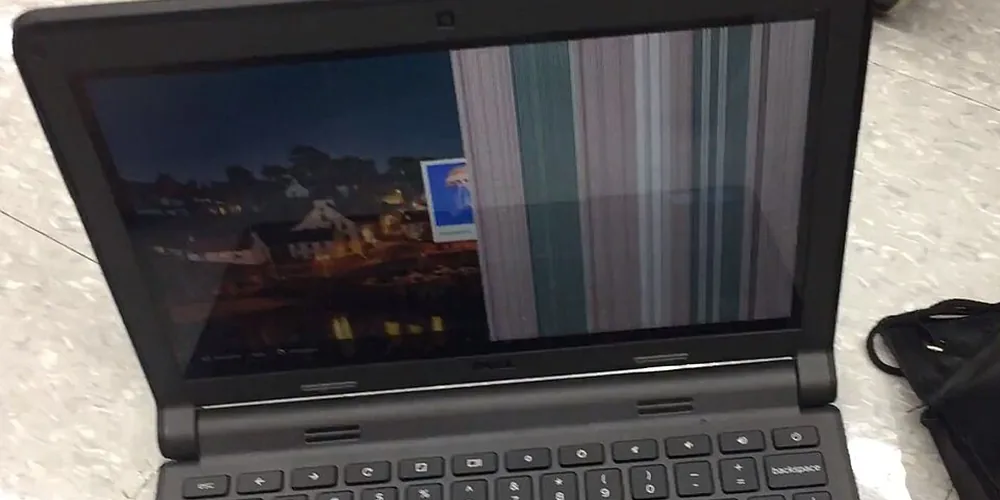
Image credit: Atomicdragon136, via Wikimedia Commons, CC BY-SA 4.0. Cropped to 1000 x 500 and converted to WebP.
2. What Causes Black Spots on Screen?
Cause 1: Dirt or Surface Contamination
The simplest explanation for black spots on screen is dirt on the screen. Dried droplets, fingerprints, adhesive residue, and dust can look like black marks on a display, especially when the screen shows a bright background.
Turn the device off so reflected light makes contamination easier to see. Wipe the surface gently with a clean, dry microfiber cloth. If the manufacturer permits a damp cloth, apply a small amount of approved cleaner to the cloth, never directly to the screen. Keep liquid away from edges, ports, seams, and speaker openings.
Do not use paper towels, abrasive pads, window cleaner, acetone, or concentrated alcohol unless the manufacturer’s instructions specifically approve them. A damaged anti-glare coating can create a permanent cloudy patch that resembles a display defect.
Fix: Safe screen cleaning removes surface contamination. If the mark remains in the exact same position on every image, continue with the pixel and panel tests.
Cause 2: Dead or Stuck Pixels
A pixel contains subpixels that produce red, green, and blue light. A dead pixel is normally black because it is not producing light. A stuck pixel is more likely to remain red, green, blue, or white.
When tiny black spots on screen stay fixed in one location, run a dead pixel test using full-screen solid colors or the device manufacturer’s built-in display diagnostic. Dell’s display pixel guidelines, for example, distinguish dark pixels from bright pixels and explain that warranty coverage depends on the model and number of affected pixels. Other manufacturers use different thresholds, so check the policy for your exact device.
Pixel-cycling software may help a colored stuck pixel in some cases, but it cannot repair a truly dead transistor or physically damaged pixel. Avoid pressing or massaging the screen. Pressure can turn a one-pixel problem into a larger LCD black spot.
Fix: Test first. Try the manufacturer’s diagnostic or a short pixel-cycling session only for a colored stuck pixel. For a persistent black pixel, check the warranty or consider panel replacement if the defect is disruptive.
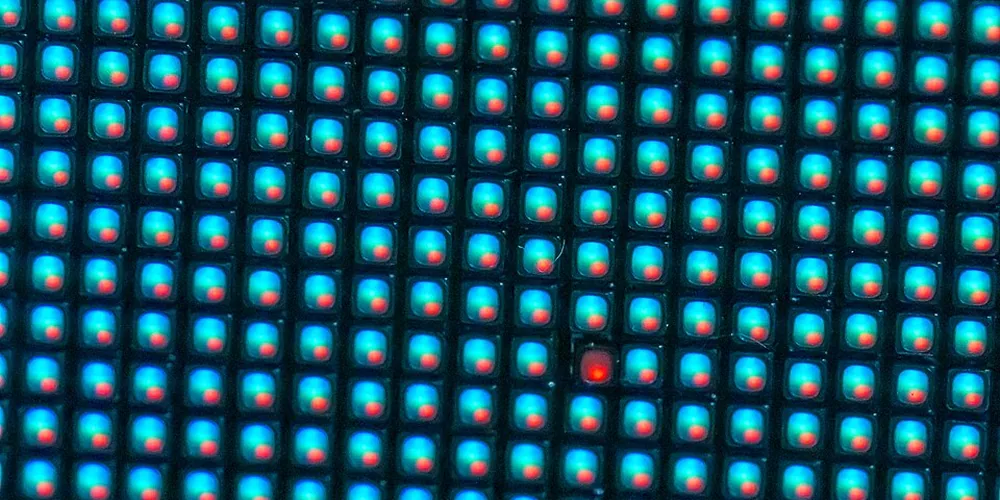
Image credit: Junyu-K, via Wikimedia Commons, CC BY 4.0. Cropped to 1000 x 500 and converted to WebP.
Cause 3: Pressure or Impact Damage
An LCD black spot that looks like spilled ink, has irregular edges, or is surrounded by colored lines usually indicates damage inside the panel. It may follow a drop, a hard object hitting the screen, closing a laptop on debris, or carrying a device under heavy pressure.
LCD layers contain liquid crystal material between delicate glass and polarizing layers. Once those layers crack or separate, software cannot restore them. Pressing the spot can spread the damaged area.
Fix: Stop using pressure-based tricks. Back up important data if the device still works, then obtain a professional repair quote or contact EagerLED for a modular LED display assessment. A cracked display panel normally needs replacement rather than component-level repair.
Cause 4: Moisture or Liquid Damage
Black spots on screen that appear after liquid exposure may signal moisture inside a display, damaged connectors, or corrosion. These faults can produce dark patches, stains, flickering, lines, or touch problems. On a phone or laptop, liquid can also damage connectors and the main board, so the visible spot may be only one symptom.
Turn the device off, disconnect it from power, and do not charge it. Do not use a hair dryer, heat gun, oven, or direct sunlight. Heat may deform adhesives and damage the battery or panel. Rice does not remove contamination from internal components.
Fix: Arrange inspection as soon as possible, particularly when black spots on a phone screen appear after water exposure. A technician can disconnect the battery safely, check for corrosion, and determine whether the display assembly or another component must be replaced.
Cause 5: Backlight or Diffuser Failure
Most LCD televisions and monitors rely on LED backlights behind the image-forming panel. A failing LED strip, damaged diffuser, loose optical sheet, or internal contamination can create TV dark spots or uneven screen brightness.
Backlight problems usually look softer and larger than a dead pixel. They may be easier to see on white or gray backgrounds and may change when brightness is adjusted. OLED displays do not use a separate backlight, so dark areas on OLED screens point to pixel wear, compensation issues, image retention, or panel damage instead.
Use only the manufacturer’s built-in pixel refresh or panel care function on an OLED display. Running refresh cycles repeatedly can add unnecessary wear and is not a repair for impact damage.
Fix: Reset picture settings and run the built-in diagnostic. If a dark cloud remains on all inputs, a repair center should inspect the backlight, diffuser, or panel.
Cause 6: Cable, Port, or Graphics Problems
Not every black area comes from a broken screen. A damaged HDMI or DisplayPort cable, a loose internal laptop display cable, a failing port, or a graphics driver problem can produce black blocks, flickering sections, lines, or intermittent loss of image.
Black spots on screen caused by a signal problem often change when the cable moves, the resolution changes, or another input is selected. They may also appear in screenshots or screen recordings viewed on another device.
Fix: Power down the equipment, reconnect the cable, and test a known-good cable and port. Restore the display’s recommended resolution and refresh rate. Update the graphics driver from the device or GPU manufacturer’s official support page. If an external monitor is normal but the laptop panel is not, the laptop cable or panel may need service.
Cause 7: LED Module or Panel Failure
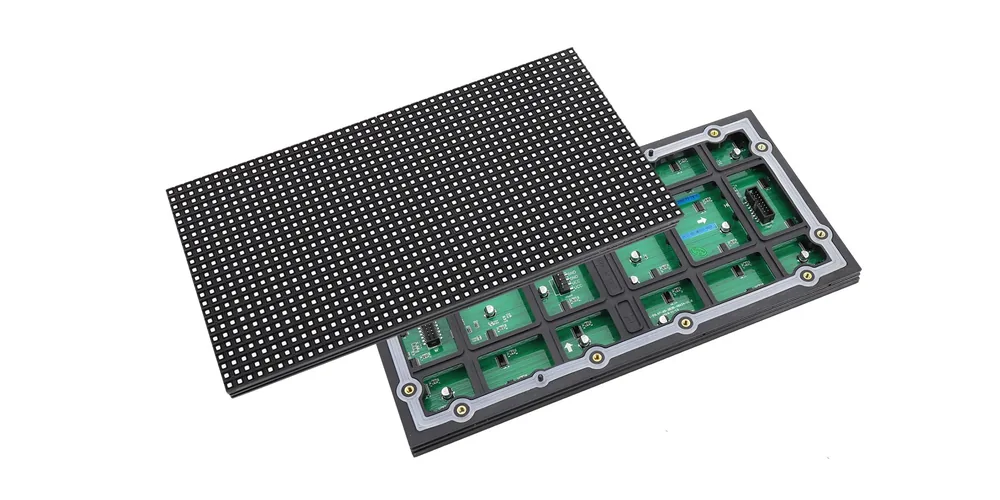
On a modular direct-view LED display, black spots on screen may appear as a dot, cluster, row, or rectangular tile. The cause may be an LED module failure, damaged lamp beads, a loose ribbon cable, a failed power connector, or a receiving-card signal problem. This differs from a consumer LCD television even though both products are often called LED screens.
The pattern provides useful evidence. One dark pixel may be a failed LED package. A dark row or column may indicate a driver IC or connection problem. A complete rectangular cabinet or module that goes black usually points to power, data, receiving-card, or module failure.
Fix: Qualified technicians can swap-test a known-good module, inspect HUB and ribbon connections, measure power output, and review receiving-card status. Disconnect power first and follow the display manufacturer’s service procedure. Do not replace modules while the display is energized.
For application-specific product guidance, compare EagerLED’s indoor LED screen solutions and flexible LED screen systems, then match the module type and service method to the installation.
3. Seven Safe Fixes to Try
When readers ask how to fix black spots on screen, the correct answer depends on the diagnosis. Try these steps in order:
- Clean the powered-off screen safely. Remove surface dirt without pressing the panel.
- Perform a complete power cycle. Shut down, disconnect power for several minutes, then restart.
- Run a solid-color pixel test. Separate dead pixels, stuck pixels, backlight patches, and software artifacts.
- Check another cable, input, and source. Rule out HDMI, DisplayPort, GPU, and port problems.
- Use the manufacturer’s built-in diagnostic. Monitor self-tests and OLED panel-care tools are safer than improvised methods.
- Update official graphics drivers and firmware. Use the device manufacturer’s support page, not an unknown driver-download website.
- Request professional repair for physical, liquid, backlight, or module damage. These defects normally require parts and proper tools.
Avoid the common internet recommendation to press, tap, or rub a black area. A screen is a layered optical assembly, not a loose connection that can be pushed back into place.
4. Should You Repair or Replace the Screen?
Repairing black spots on screen is usually worthwhile when the device is valuable, the fault is limited to a replaceable cable or LED module, the product is under warranty, or the repair cost is substantially lower than replacement.
Replacement is more practical when the panel is cracked, an ink-like spot is spreading, multiple areas have failed, liquid has damaged several components, or the display panel costs nearly as much as a new device.
Before deciding, record the model number, purchase date, symptoms, and clear photos on white, black, red, green, and blue backgrounds. Ask the repair provider whether the quote includes the panel, labor, calibration, shipping, taxes, and a warranty on the repair.
5. How to Prevent Black Spots
To reduce avoidable black spots on screen, start with these habits:
- Carry laptops and tablets in rigid, padded protection.
- Never place objects on the keyboard before closing a laptop.
- Mount televisions without twisting or pressing the panel.
- Keep liquids away from devices and do not spray cleaner directly on a screen.
- Use the recommended brightness and built-in panel-care features.
- Provide ventilation around televisions, monitors, and LED controllers.
- Inspect modular LED display connectors and power supplies during scheduled LED display maintenance.
- Save purchase records and review the pixel-defect policy before the return window closes.
These habits cannot prevent every electronic failure, but they reduce avoidable screen pressure damage, moisture entry, coating damage, and overheated components.
6. Black Spots on Screen FAQ
7. Conclusion
The safest way to handle black spots on screen is to diagnose before attempting a fix. Begin with cleaning, a solid-color test, a screenshot check, and a different cable or source. These steps quickly separate surface contamination and signal problems from dead pixels, pressure damage, backlight faults, and LED module failures.
If the spot is ink-like, growing, associated with liquid, or visible across every input and diagnostic screen, stop using home remedies. Document the symptoms, check the manufacturer’s warranty, and ask a qualified technician whether targeted repair or full panel replacement offers better value.
 Mini Jumbotron: Complete Buying Guide and 9 Expert Tips
 How to Choose a Church LED Screen: Complete Guide
Related Posts





Fill In Your Needs In Detail
Fill in the screen usage scene and size you need in “Content”.You will get a quote.